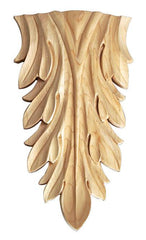
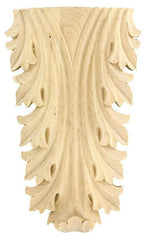
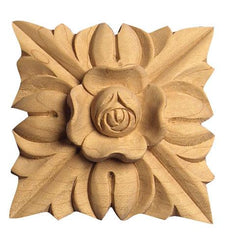
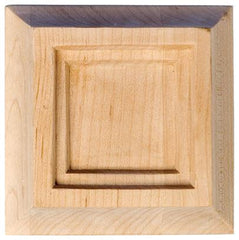
5-7/8"H X 20-1/8"W X 5/8"D - Extra large lotus applique / cartouche (SKU: CP-RWC18-XL)
Description
Comprising a vast selection of the finest quality architectural elements, the Royal Wood Collection is handcrafted by master artisan in your choice of solid North American Hard Maple, Red Oak, Cherry, and Alder.
Installation:
These items can be mounted with the pre-attached keyhole brackets. All other items apply a bead of standard construction adhesive to the back of ornament and secure to mounting surface using finish nails or standard screws.
Pre-drill and countersink all nails/ screws. Fill any holes with wood putty, and sand with a fine grit sandpaper.
Finishing:
Can be painted or faux finished with any quality latex or oil based product. If painting, a prime coat is required. Can be stained with standard stains. Follow stain manufacturer’s instructions for top coating.
Product varies in color from piece to piece and has a wood grain texture.
- Hand-carved by skilled craftsmen from Grade 'A' Hardwoods.
- Ready to accept stain or paint.
- Premium Select Hardwood.
- Use to add a decorative touch to any room.
- Easy to install.
- Triple Sanded.
- Attention to Details.
- Deep relief with realistic detailing.
- High Quality.
- Most value for your money.
Measurements
Height : 5-7/8"
Width : 20-1/8"
Depth : 5/8"
Installation
Tools:
- Unfinished Wood Ornaments such as Corbels, Mouldings, Appliques, etc
- Paint Brush
- Rags
- Pre-Stain Wood Conditioner
- Oil or Acrylic-based Wood Stain
- Oil or Acrylic –based Polyurethane Sealer
- 120 Grit and 220 Grit Sandpaper
- Cheese Cloth towels
- Goggles
- Protective mask
Prepare:
Decide which Type of Stain to use. You could use either an Oil base or Acrylic based Stain. Whichever you decide, you will also be using the same type of Sealer to finish up the staining process. When staining, make sure the room temperature is between 70 and 75 degrees for best results. Also it is very important to test your stain colors on smaller samples of wood so that you know exactly what finish you will achieve.
Steps:
1. SANDING
Most of Architectural Product’s Wood ornaments are mostly ready to be stained. However, there will instances where the wood will need to be sanded down to remove scratches etc. Then brush off any debris so that you could go onto the next step.
2. PRE-STAINING WOODS
Not all wood are uniform in color or texture also woods are porous with different densities. Therefore, wood will absorb stain in an uneven manner. To obtain a consistent and even finish, use a Pre-Stain Wood Conditioner found at any home store. The Pre-Stain Wood Conditioner is applied on the raw wood using a cloth or brush. Allow it to penetrate for about 10 to 15 minutes. Remove any excess afterwards. The Stain should be applied with 2 hours.
3. STAINING
Apply the stain with a wide brush evenly or rag. It is your choice of which one to use. Make sure your area is well ventilated. Stains will produce fumes. Always apply going with the grain and against the grain as well. The purpose is to apply the stain to cover all visible surfaces. It depends on how light or dark you need the wood to be. It you need a lighter look, wipe off the stain immediately. For a darker tone, leave the stain for 5 to 10 minutes before wiping it. When cleaning off the Stain residue, go in the direction of the grain so that the stain will penetrate into the grain of the wood. If a second coat is required, it is advisable to light sand the wood with the 120 Grit sandpaper and wipe off any debris. BRUSHES are better for staining Ornate Carvings and other had to reach areas. RAGS are best for flat surfaces. If you are an experienced wood worker, you could achieve an ANTIQUE
FINISH by using water down black paint and brush it into the cracks and details or your wood ornaments. After a few minutes of applying the water down black paint, wipe off any surface excess. This will add a beautiful accent to your carved wood ornaments.
4. SEALING YOUR WOOD
Remember, stain will only provide color to you wood NOT a finish. Therefore, you need to apply sealer. Remember to use the same base type of material. That is Oil-base Stain to Oil-based Sealer, acrylic based Stain to acrylic based Sealer. Apply it by using a brush or sprayer. Let it dry. If needed, sand with 220 Grit sandpaper. Wipe clean and apply another coat of the Polyurethane
Sealer. Sealers are mostly known as varnish, shellac or wood polish.
|


